
Preparing and anchoring Pillar Slim directly to a concrete base
Article contents
The technical section is intended for a qualified professional. Sizing examples do not replace a site-specific design or the supplied equipment's documentation.
This professional procedure describes a specific original configuration or local SmartSystem interface. Verify applicable steps and parameters against the control unit and supplied equipment's documentation. It is not universal for every TouchPoint variant.
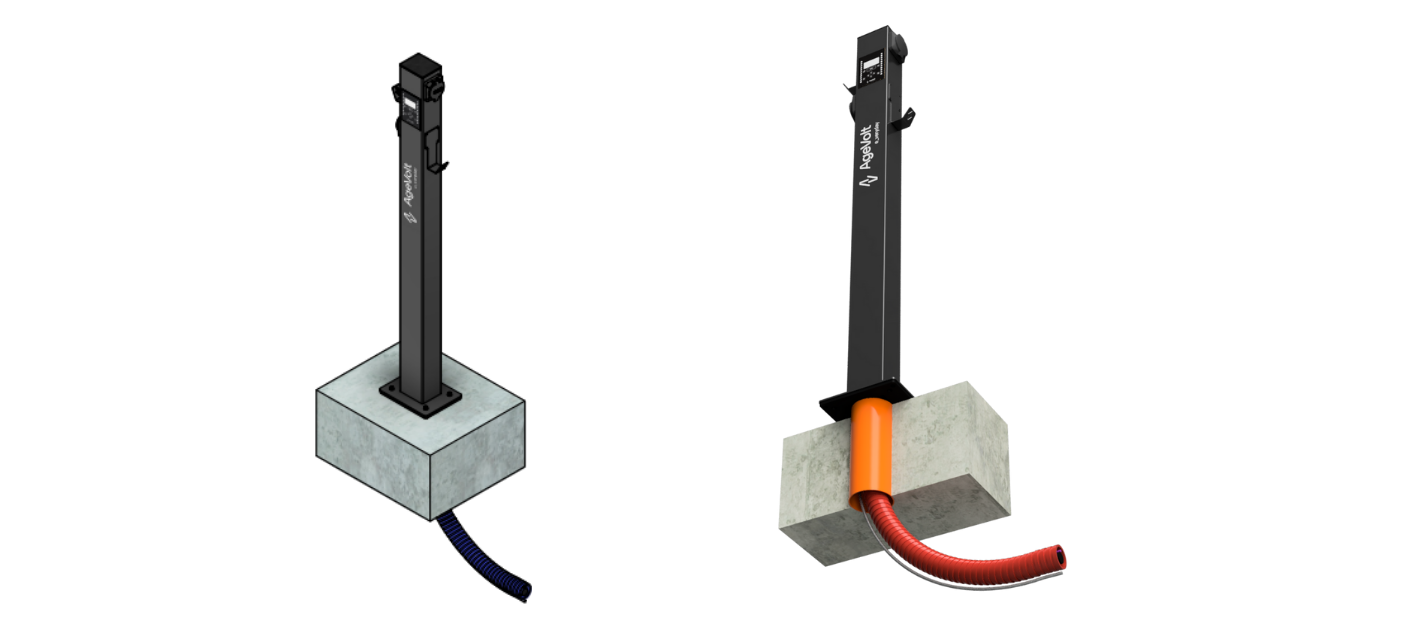
1. Why integrate a pipe into concrete?
- Cable protection and spare space — a KG DN125 drainage pipe (Ø ≈ 120 mm) provides a protected passage for power, data and earthing cables.
- Simple installation and servicing — the large pipe diameter permits gentle cable positioning during installation and later maintenance.
- Expansion space — reduces strain on connectors and anchors during temperature changes or vibration.
2. Concrete foundation dimensions and parameters
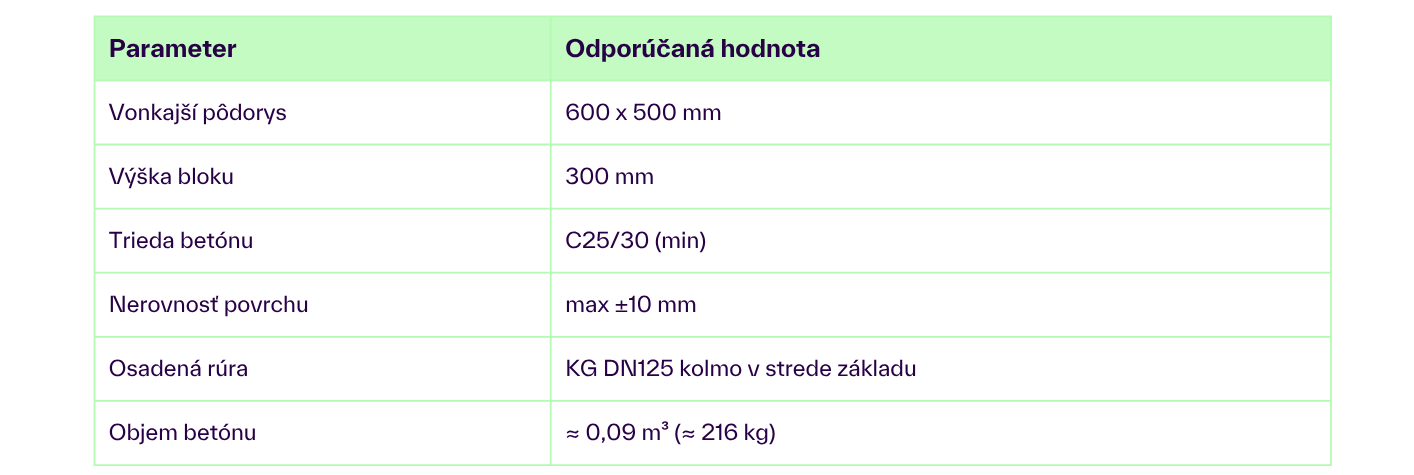
Note: orient the block so the pipe centre matches the future stand axis and parking-space direction.
3. Before concreting
- Mark the foundation position according to project documents, allowing working space around the stand.
- Excavate and compact the bed — a gravel base of at least 100 mm is recommended.
- Formwork and reinforcement — a simple reinforcing cage using Ø 8 mm bars is sufficient for an ordinary car park.
- Installing the KG DN125 pipe: Keep the pipe vertical and prevent concrete entering by closing its top.
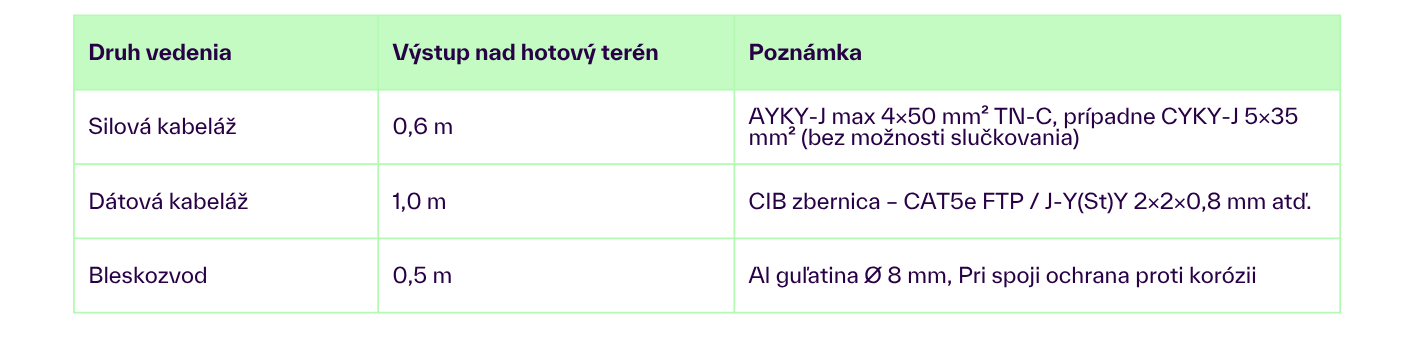
- Run auxiliary HDPE conduits (Ø 40/50 mm) for power and data at least 300 mm above ground.
4. Cable routing above ground
5. Concreting and curing
- Pour concrete in one operation and vibrate it to prevent cavities around the KG pipe.
- Allow at least 72 hours of curing at 20°C before further work.
6. Drilling anchor holes using the mounting template
- Place the mounting template AV-800-P030 over the centre of the installed pipe.
- Check orientation relative to the parking space.
- Mark hole positions on the concrete, remove the template and drill holes for M16 chemical anchors to at least 90 mm depth.
7. Installing and connecting Pillar Slim
- Feed cables through the KG pipe and the outlet opening in the stand base.
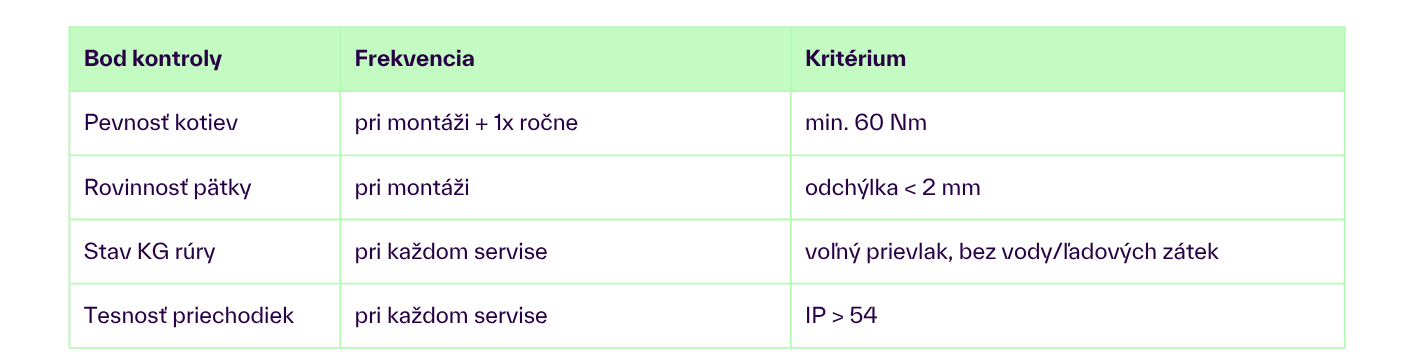
- Slide the Pillar Slim base over the prepared holes, insert anchors and tighten to 60 Nm.
- Connect:
- power cables to L1–L3, N and PE terminals,
- data cables to CIB terminals,
- lightning protection to the M8 threaded section on the base.
- Perform electrical tests including insulation resistance and protective-earth continuity, then commission according to the service manual.
8. Inspection points and maintenance
Quick tips
- Ensure the surface is level. An uneven base twists the stand and distributes anchor forces incorrectly.
- Mark the parking direction before concretingso the Pillar Slim display faces the driver correctly.
- Fill the pipe with materialthat absorbs moisture, capturing condensation or infiltrating rainwater and protecting cables from corrosion and mould.