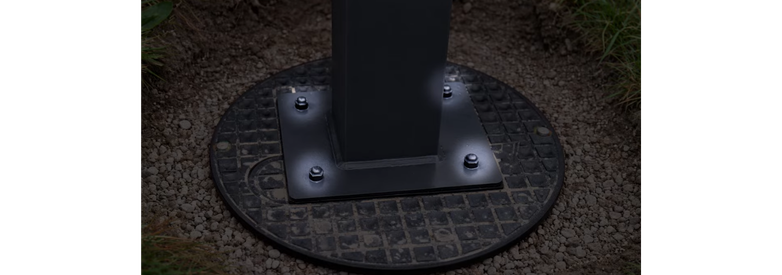
Installing AgeVolt SmartBase
Article contents
The technical section is intended for a qualified professional. Sizing examples do not replace a site-specific design or the supplied equipment's documentation.
1. Introduction
AgeVolt SmartBase is underground preparation for charging infrastructure. It enables concealed cabling and later installation of an AC station without complex concrete work. It simplifies installation, speeds up site preparation and supports flexible expansion according to project needs.
2. Package contents
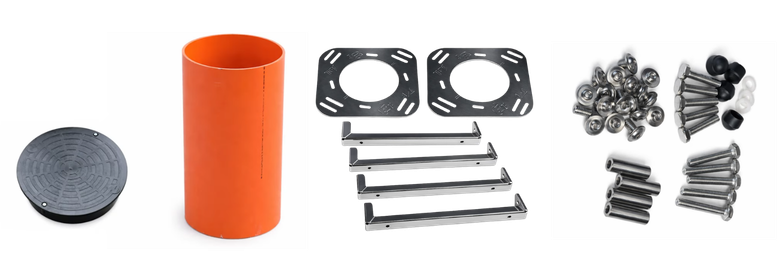
At the start of installation, you will receive:
-
a pipe,
-
disassembled SmartBase,
-
a bag of fasteners,
-
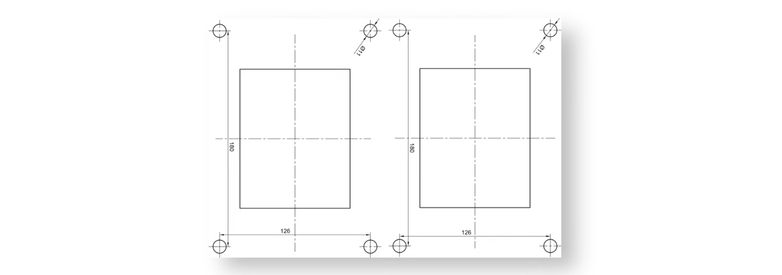
a template for cutting the cover opening and marking four drill holes.
Before starting, check that the delivery is complete and prepare tools appropriate to the installation method.
3. Assembling the SmartBase steel structure
Step 1: preparing the upper plate
Start by fitting the first plate as shown in the video. Orient it correctly, with the engraved car symbol facing upward.
Attach the first four bolts with rollers to this part. Set the prepared part aside temporarily.
Step 2: assembling the lower structure
Prepare another plate and four U-profiles. Attach each U-profile to the plate with one bolt. Leave these bolts slightly loose at this stage so the structure can be adjusted during further assembly.
4. Preparing the pipe
Step 3: marking holes on the pipe
Mark four points around the upper circular edge, evenly spaced at right angles. Use a spirit level or other suitable tool to mark an accurate cross through the centre.
Draw lines downward from these four points. Then measure from the upper edge of the pipe a distance of 8,5 cm and mark drilling points there.
Drill the marked holes for the SmartBase anchoring bolts.

5. Installing SmartBase in the pipe
Step 4: securing the structure inside the pipe
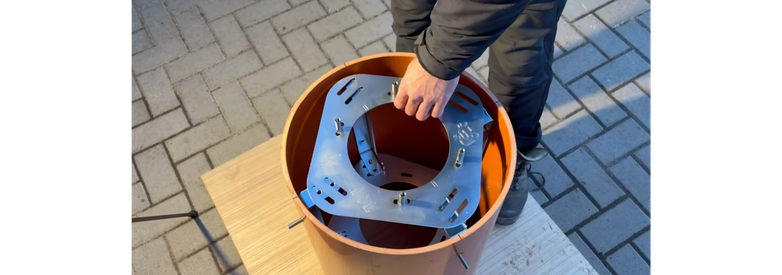
After preparing the pipe, insert SmartBase without the upper section and secure it with four bolts according to the installation procedure. Tighten these bolts firmly so the inner structure is stable and ready for further loading.
Step 5: fitting the upper plate
Fit the upper plate, again correctly oriented with the installed rollers facing upward.
Check that the engraved car symbols on the lower and upper plates have the same orientation.
6. Preparing the cover
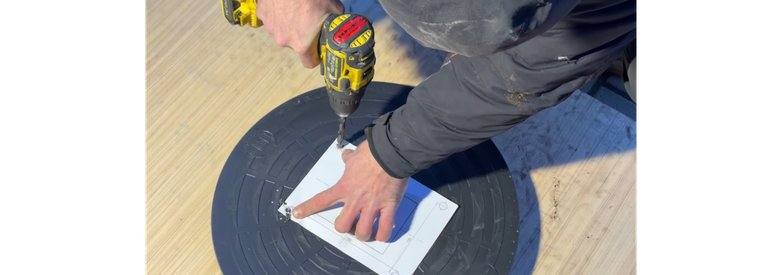
Step 6: placing the template
Prepare the supplied template before cutting the cover opening. Position it lengthwise as specified in the procedure, so the cover bolts are on the longer side.
The marked centre of the template must align exactly with the cover's centre.
Step 7: marking and drilling holes
Using the template, mark:
-
the four corners of the cutout,
-
the outline of the opening,
-
four holes for subsequently anchoring the AC charging station pillar.
Drill the relevant holes after marking.
Step 8: cutting the cover opening
Remove the template and cut a rectangular opening in the cover for routing cables into the charger.
Use suitable tools or a cutter, but only within the area defined by the template.
7. Installing SmartBase in the ground
Step 9: placing it in the ground
Once SmartBase is prepared, it can be installed in the ground. It is important to maintain:
-
level positioning,
-
correct orientation,
-
the engraved arrow pointing towards the parking space.
This orientation ensures that the AC charging station is subsequently installed perpendicular to the parking space.
Step 10: backfilling and routing cables
After positioning correctly, backfill around the pipe and secure it in the ground. Pull cables upward through SmartBase, ready for final station connection.
The public SmartBase description likewise specifies installing the underground chamber vertically, backfilling and bringing the top to ground level.
8. Installing the cover and pillar
Step 11: fitting the cover
After routing cables, fit the cover and secure it with two side bolts. Press it firmly down so it seats correctly on SmartBase's internal steel structure.
Press firmly so every part sits securely in place.
Step 12: fitting the seal
Place the rubber seal on the correctly fitted and bolted cover.
Step 13: installing the pillar with the AC charging station
Place the pillar and AC charging station on the prepared cover and seal. Secure the pillar with the corresponding SmartBase bolts.
After final tightening, fit the decorative bolt caps.

9. Final inspection
After installation, visually inspect the whole assembly, particularly:
-
whether the charging station is level,
-
whether it aligns with the parking space,
-
whether the cover is seated correctly,
-
whether all bolted connections are tight,
-
whether caps and the seal are fitted correctly.
Finally, step back and visually check that the station is correctly oriented to the parking space and appears both tidy and functional.
10. Important installation notes
Throughout installation, observe these principles:
-
always orient plates correctly according to the engraved symbols,
-
keep the engraved car symbols in the same orientation on the lower and upper plates,
-
accurately mark and drill holes in the pipe,
-
cut the cover only according to the supplied template,
-
install SmartBase level,
-
always point the engraved arrow towards the parking space,
-
check the installed station's alignment and appearance before final handover.